There are not any microphones in the room. We recommend the following mics:
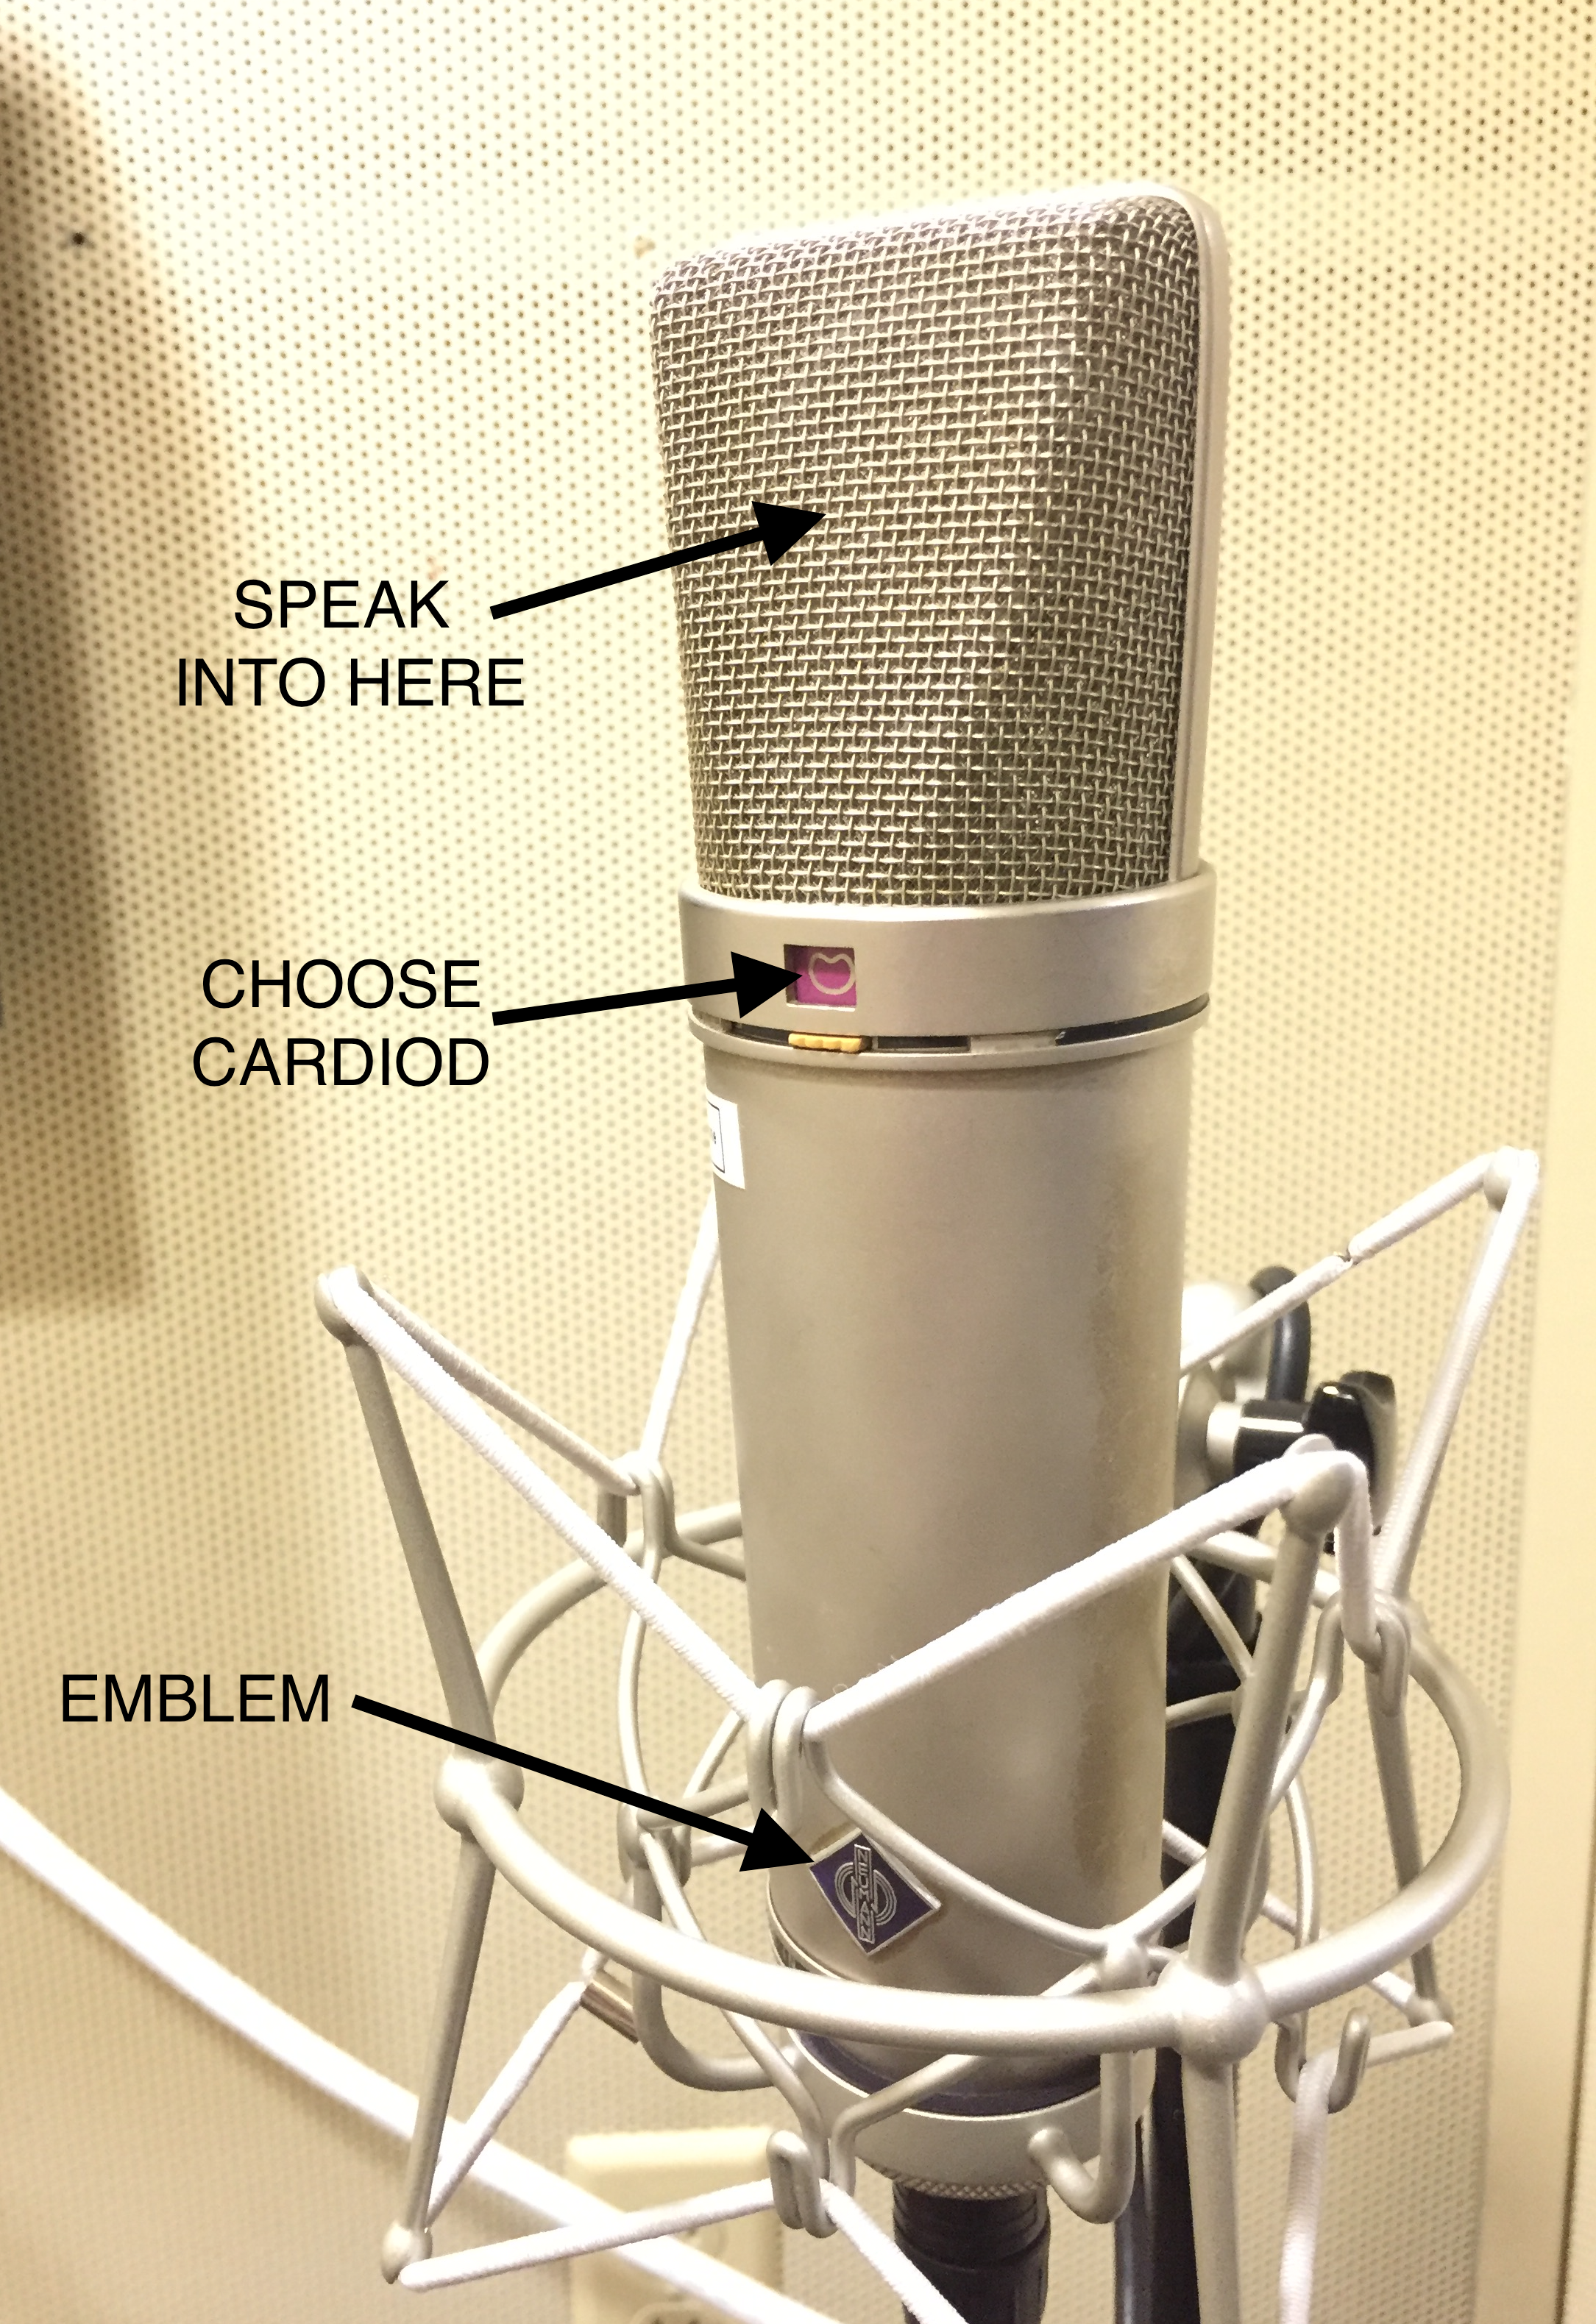
Neumann TLM 103 or U87
Audio Technica 4050 or 4033
Here is a wiki on setting up and recording with these microphones.
| Plug your mic into the booth. |
|
Open a new session 48KHz 24bit | |
This Message prompt will tell you that your audio is getting routed differently it is OK to click on NO you don't want a detailed report |
|
when protools is open Go to Setup>Playback Engine |
|
| Make sure it is set to HD Native Thunderbolt |
|
If it is not then make sure that the thunderbolt to the AVID HD Native is plugged in. | |
Check that the Thunderbolt cable is plugged into the iMac |
|


| Create a new track by going to the track menu and selecting "New..." |
|
| Use these settings |
|
| Click this dropdown... |
|
| ...choose I/O |
|
Now your track should look like this. Choose A1 for your input Choose Stereo Monitor for you output |
|
| Plug Headphones into the headphone jack. This jack is located in the isolation booth. |
|
| This knob controls the volume for the headphones in the iso booth. |
|


If doing ADR:
Import the QuickTime movie to chase in the ProTools project.
YOUR VIDEO NEEDS TO be A 720P QUICKTIME SEE THIS WIKI https://wikis.utexas.edu/display/comm/AVID+-+H264+QuickTime+Export++-+For+Video+Playback+in+ProTools
Next Import the video into the project |
|
Navigate to the video file that you want to view in the ProTools session |
|
Choose New Track |
|
Choose to import at Session Start |
|
Choose to enable the Video Engine |
|
If you would like to use the audio off the video file choose to save it to the default Audio Drive folder Make a "New Folder" to save the files to
|
|
Video Engine will launch and you should be able to see the image on the monitors inside and outside of the booth |
|
| To record your ADR, Record Arm the ADR_001 track. It should Flash Red when you press the record button |
|
| Press the red record button on the "Transport Tool" as well |
|
Place the marker where you wish to record and click Record Click and drag to select a portion you want to record |
|
| Click Play then play. Record mode will start and you will be recording whatever the mic picks up. |
|
In CMB 1.106B there is noticable "Rumble" on the VU in the ISO booth ith the U87. The VU should not be bouncing that high with no one talking |
|
This is what the rumble looks like through Insight. The low end should be much flatter, to create more of "noise floor" and less of a "noise valley" You'll want to get rid of this. If you have a professional mix for your class, leave it. The mixer will fix it...If not FOLLOW THIS WIKI |
|


To consolidate your files when you are finished recording you need to save them on to your hard drive. Go to >File>Save Session Copy In |
|
The next menu will come up and choose the "Session Format" allowing you to choose the current version running or a previous version of the software. |
|
Choose where you want to save the session copy and audio files |
|


